Monday, July 13, 2015

CLAY VIKING SHIPS


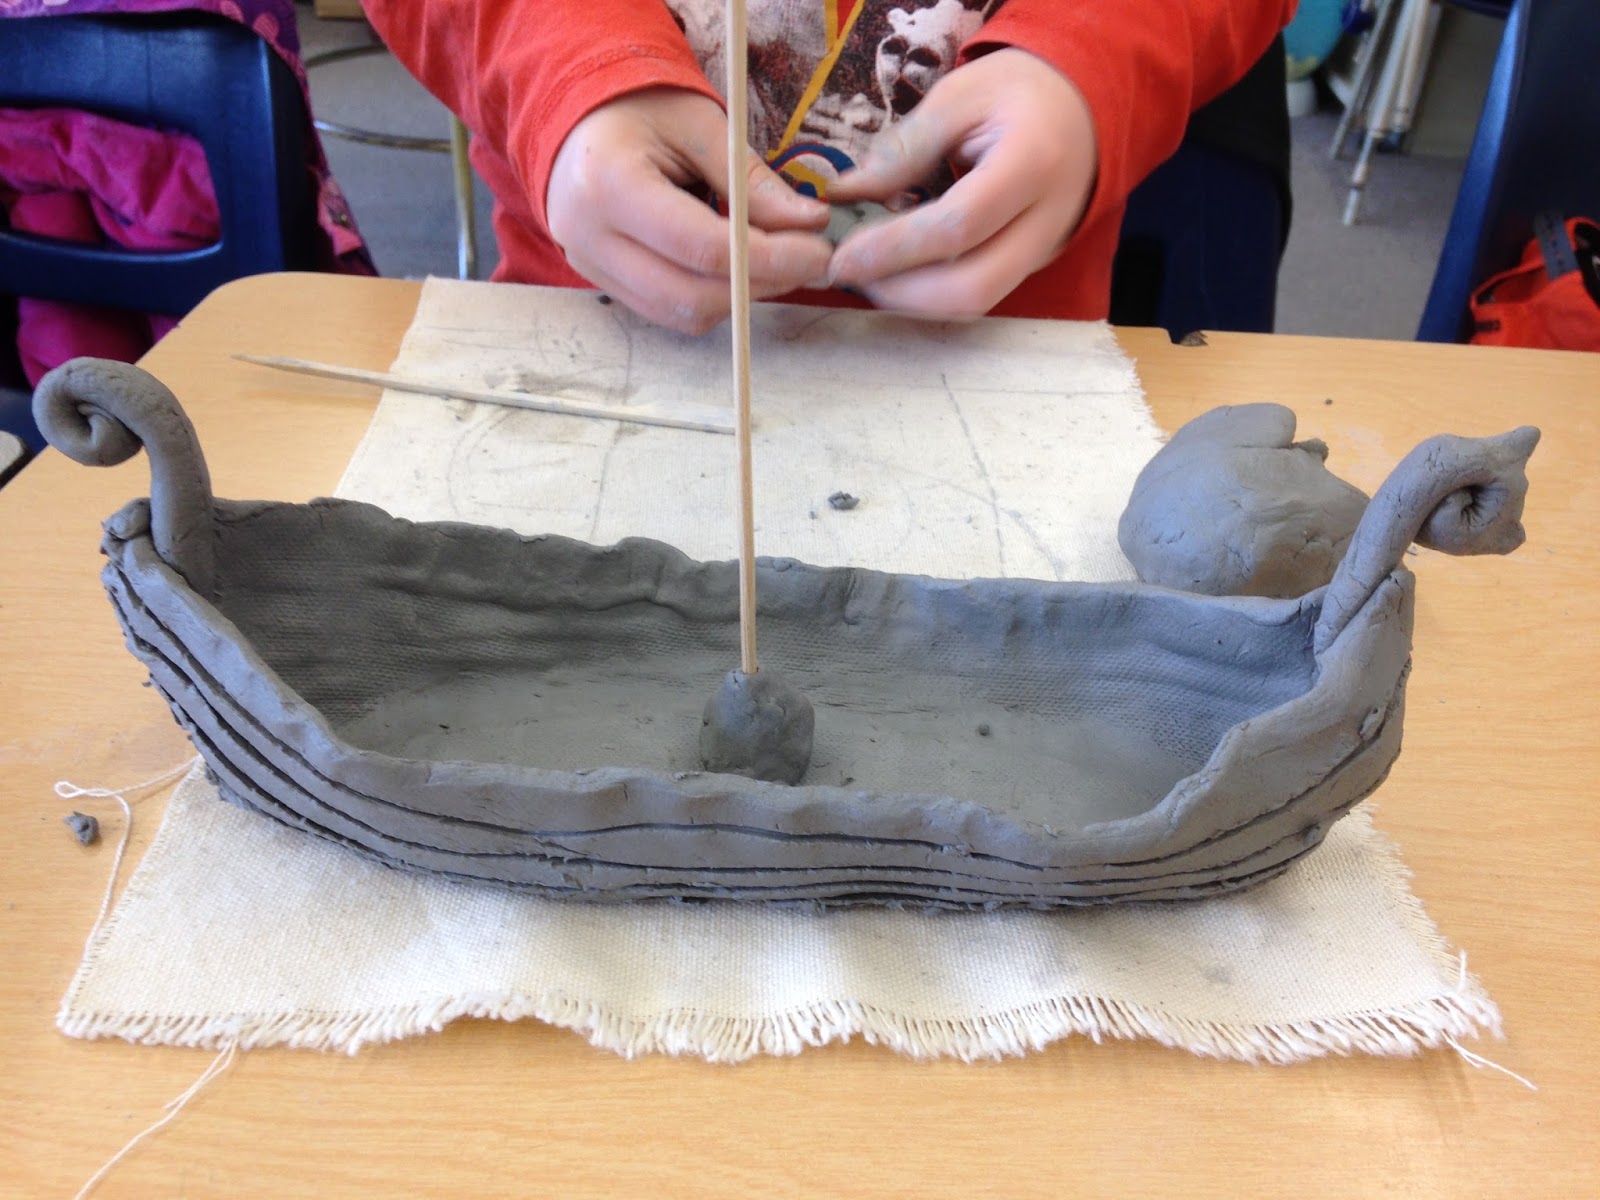
Occasionally I get called to do an “Artist in the Classroom” session.  Often times the teacher leaves it to me to come up with a project, other times there is this wonderful collaboration with the teacher, and other times the teacher will simply name the project and I will come up with an idea for it.  Such was the case with this project.  Earlier in the year, this grade 4 teacher simply asked if her class of 28 could make clay Viking ships, as they were discussing Medieval Times.  I said yes of course.  Then it was off to the drawing board.  

After plenty of research to determine what a Viking ship might have looked like (and it was an added bonus that we were watching the series "Vikings" at the time), I first tried pinching the viking ship shape but that was tricky and time consuming, with poor aesthetic results.  This method would be especially disappointing for smaller untrained hands. Then I tried putting slabs together for the bottom and sides of the boat, but that got complicated and awkward and didn't hold up so well in assembling (not to mention it just didn't look right).  Even if I can make it happen a certain way, its important for me to keep in mind that these little hands are likely not accomplished clay builders. First rule is to keep it simple.  Make it interesting but doable, and they will enjoy creating it.  If I follow my first rule, especially with children, there is a sense of accomplishment, and usually a sense of amazement at that accomplishment.  This in turn builds confidence to continue along in that creative vein and that’s is most important.  I witness (with great joy) this happening all the time. Children will embrace a challenge if its a reasonable one.  

Finally, from a ship that I pinched out and cut in half, I was able to form a pattern for the hull of the boat that was one piece.  After cutting out this basic pattern from a rolled slab, the ends are pinched together and the hull stands up just fine.  After that basic construction the really fun part begins and individual design elements are incorporated.  


Aside from a canvas mat and shared rolling pins, I give students one tool to work with - a bamboo skewer that is pointed at one end and is good for cutting, and a little wider and flat at the other end, good for smoothing and pressing.  Mostly I encourage using hands.   


This session was such a wonderful experience.  The students remained engaged with very little goofing off and I was amazed at the creative initiative each one took in adorning the ship and making it their own.  The focus was incredible and there was so much positive creative energy in the room to feed off of.  


 Some even had time to make a paper sail. 


And some vikings!


Monday, July 6, 2015

MONOTYPE PRINTMAKING with Summertime Flora


Every second Saturday you can come down to the Campbell River Art Gallery studio and join me in some free art making - from 1-3 pm.

Not many showed up this past Saturday and I'm sure its due to the stinking hot weather, but we did have a few.  I should mention how cool and comfortable it is in the air conditioned studio.


Kids love printmaking.  Maybe it the mystery factor - their eyes seem to widen when it comes time for the reveal.  Of course I make a big deal of it too because I'm also excited. And since there is little control over the end result you really can't wait to see it!

While building your plate you have an idea of composition and placement of elements and colours, but then you must consider that you are working in reverse and that not all of what you put down will transfer in that exact way.  But hey, doesn't everyone love surprises?

There are so many ways to approach monotype printmaking. Here we used acrylic paints instead of ink.  Ink works better but also dries quicker so you have to work faster.  


We put down some background colours on plastic place mats, using brayers.  Then we rolled or brushed paint onto leaves and flowers and placed them down on the same mat. 


Then, we lightly sprayed the entire surface with water to re-dampen any dry areas.  Finally, we placed heavy paper down on top of it all and pressed. 


And then, the reveal!


Sure, it was a bit messy.......


.......but whole lot of fun!!


Plus, I really love hearing "I'm gonna try this at home"


Thursday, July 2, 2015

Canada Day Awesomeness

Well it was indeed a big awesome day!  Everyone donning red and white and milling about carrying little Canadian flags.  Spirit Square was alive with entertainment while the streets surrounding it were blocked from traffic and instead housed tents filled with art, crafts, pottery, face painting, food, jewellery, and even a few activists.  And lets not forget the parade, pancake breakfasts and fire works.  Well done Campbell River!


It was really inspiring to see these two patriots, so completely decked out in Canadian paraphernalia, come in to make pinwheels to add to their ensemble.  It really must have taken some time to put this look together.  


Many thanks to Greta, my invaluable helper for the day.  We had 70-80 pinwheels makers in those 3 hrs.


While I was busy working at the art gallery my good friends Emma and Gillian, manned our pottery sale in the street.  


All in all it was a pretty fun and fantastic day!