Monday, March 7, 2016

Bird's Nests

Bird's Nests

Here is a great spring project!  We made these last year around Easter time during the Downtown BIA 's (Business Improvement Association) annual Easter Egg Hunt. 


Quite a lot of people came out to build a nest and that was great because they were quick, easy and fun. We set up in the lobby of the Campbell River Art Gallery for easy access and clean up. This project would be great to do outside. 

I gathered long dried grasses, green moss, and dried branches with dead flower heads.


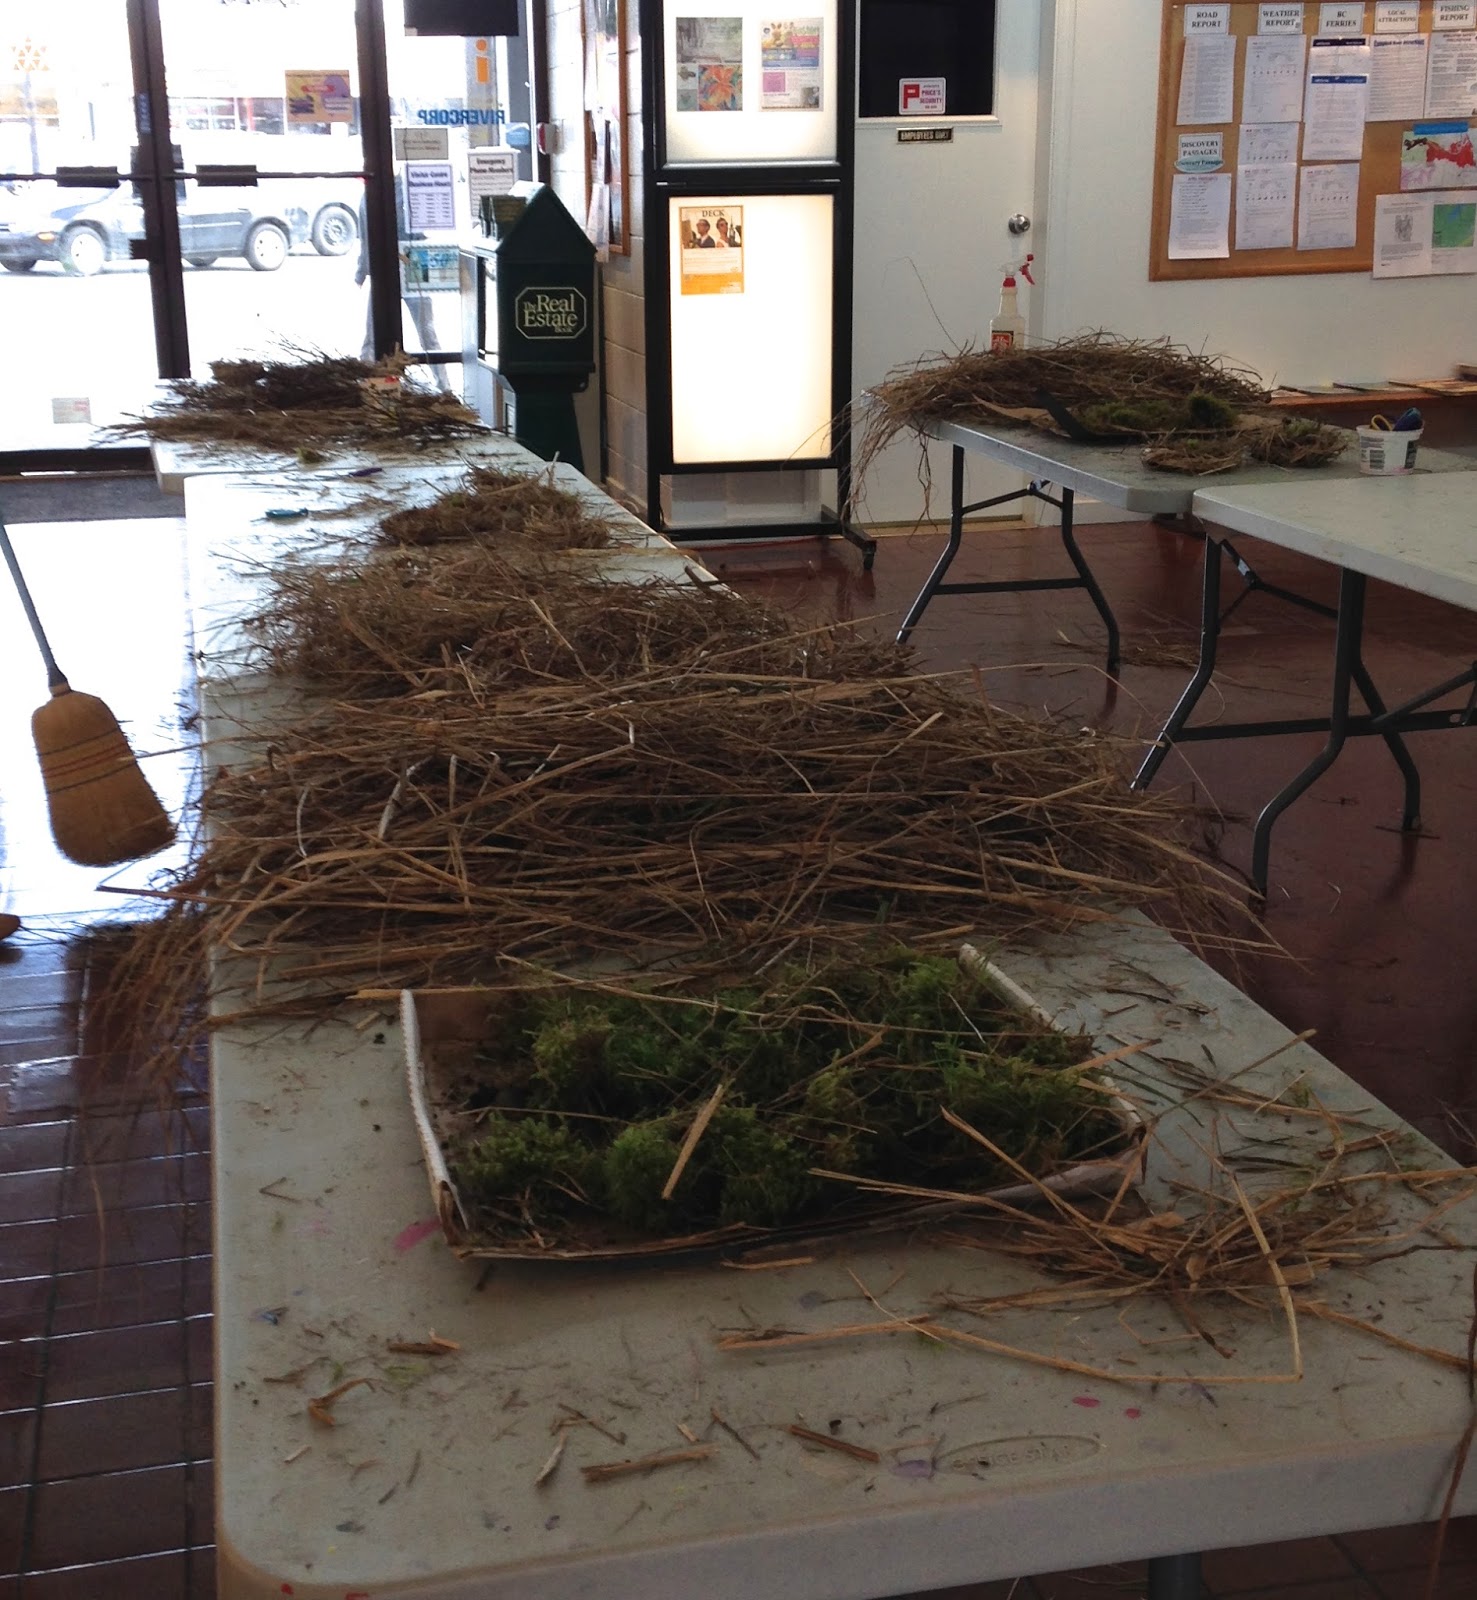
Simply take a handful of grass and twist it while shaping it into a circle and then twist the ends together and tuck them into the nest. Do this again, making a smaller circle, and insert it into the larger one.  Pull and tuck the grass to form a beautiful nest. 


Place some moss in the bottom and decorate with dried flowers. Its as easy at that!


Place some egg shaped rocks into your nest to represent robins eggs.  Or set it out in your garden for the birds to use.


Beautiful!!


This year the egg hunt takes place at Ostler Park on March 26.  Check it out.  We will be making tissue paper flowers at the gallery.

http://www.downtowncampbellriver.com/easter-event


Monday, February 29, 2016

Weaving


SUPER SATURDAY FUN WITH WEAVING


We started out with empty egg carton halves as our loom and plenty of yarn and ribbon to weave with.  Empty milk cartons would also work well for this or if you want a larger project an empty shoe box or shoe box lid would make a good loom. 


Cut slits about 1/2' deep and 1/2' apart (or wider depending on your weaving materials) on the sides of the carton. Weave your base back and forth through these slits and across the carton - this is called the warp.  Tape down the ends to tie off later.


Begin weaving materials, switching colours and textures as often as you like - this is called the weft - leave the ends loose and tie them off later.


Tie off loose the ends and remove from loom.


Weave a stick through the beginning loops and you can hang it.


We also had some popsicle sticks and glue guns out. 

NOTE:  left alone with materials, creative minds will flourish.


You can incorporate weaving into your next amazing multi-media sculpture!


 Kaitlyn and her Dad's collaborative "pirate ship with dragon" project 


It was truly a super fun Super Saturday at the Campbell River Art Gallery


Monday, February 22, 2016

Clay fish

Paper clay is so great to work with, especially so for those who are new to clay.  

Paper clay is simply clay that has been incorporated with paper. I generally make it myself, from bits and scraps of clay and toilet paper, however, the clay used here was purchased from the potter's supply.

The great thing about paper clay is that it wants to bind to itself and so attaching elements with just a little water works quite well and pieces stick together really well. Another good thing about paper clay is that it rarely cracks when drying and doesn't require special attention during the drying process.   

We started by drawing a fish shape onto a piece of paper.  Next, place it on rolled out clay and cut around it - twice.


Lay one shape over the other and pinch around the edges, leaving the bottom open.


Next, stuff newspaper from the bottom, in between the two fish shapes, to give it some shape and volume. This will help it to stand up as well.


After that, its simply about adding details and giving your fish some character.


Allow to dry and then paint with acrylic paints if desired.